Introduction
Getting Started
Networks
Volumes and Snapshots
Images
Instances
Flavors
Tenant Administration
User Administration
Accessing VMs
Application Management
CLI Access
Monitoring & Alarms
Troubleshooting
Tutorials
Support
Regions
Powered By
Adding a host is the first step to setting up your PMO cloud!
We recommend adding at least three hosts to your PMO cloud for a minimal setup.
Before you add a host, please ensure the following.
- The host is configured with sufficient local storage or shared storage for virtual machines to run on the host.
- The host has at least one network interface (configured with either flat or VLAN networking) and outbound https access.
- The System Requirements for Linux-KVM and/or Networking Pre-Requisites are met.
You must be an administrator to perform this operation.
To add a host, follow the steps given below.
- Log in to Clarity.
- Click Infrastructure in the left panel.
- Click the Hosts tab.
- Click Add Host seen on the top right corner.
- Click Download Installer to download the host agent installer for the operating system version of the host that you are adding to Clarity.
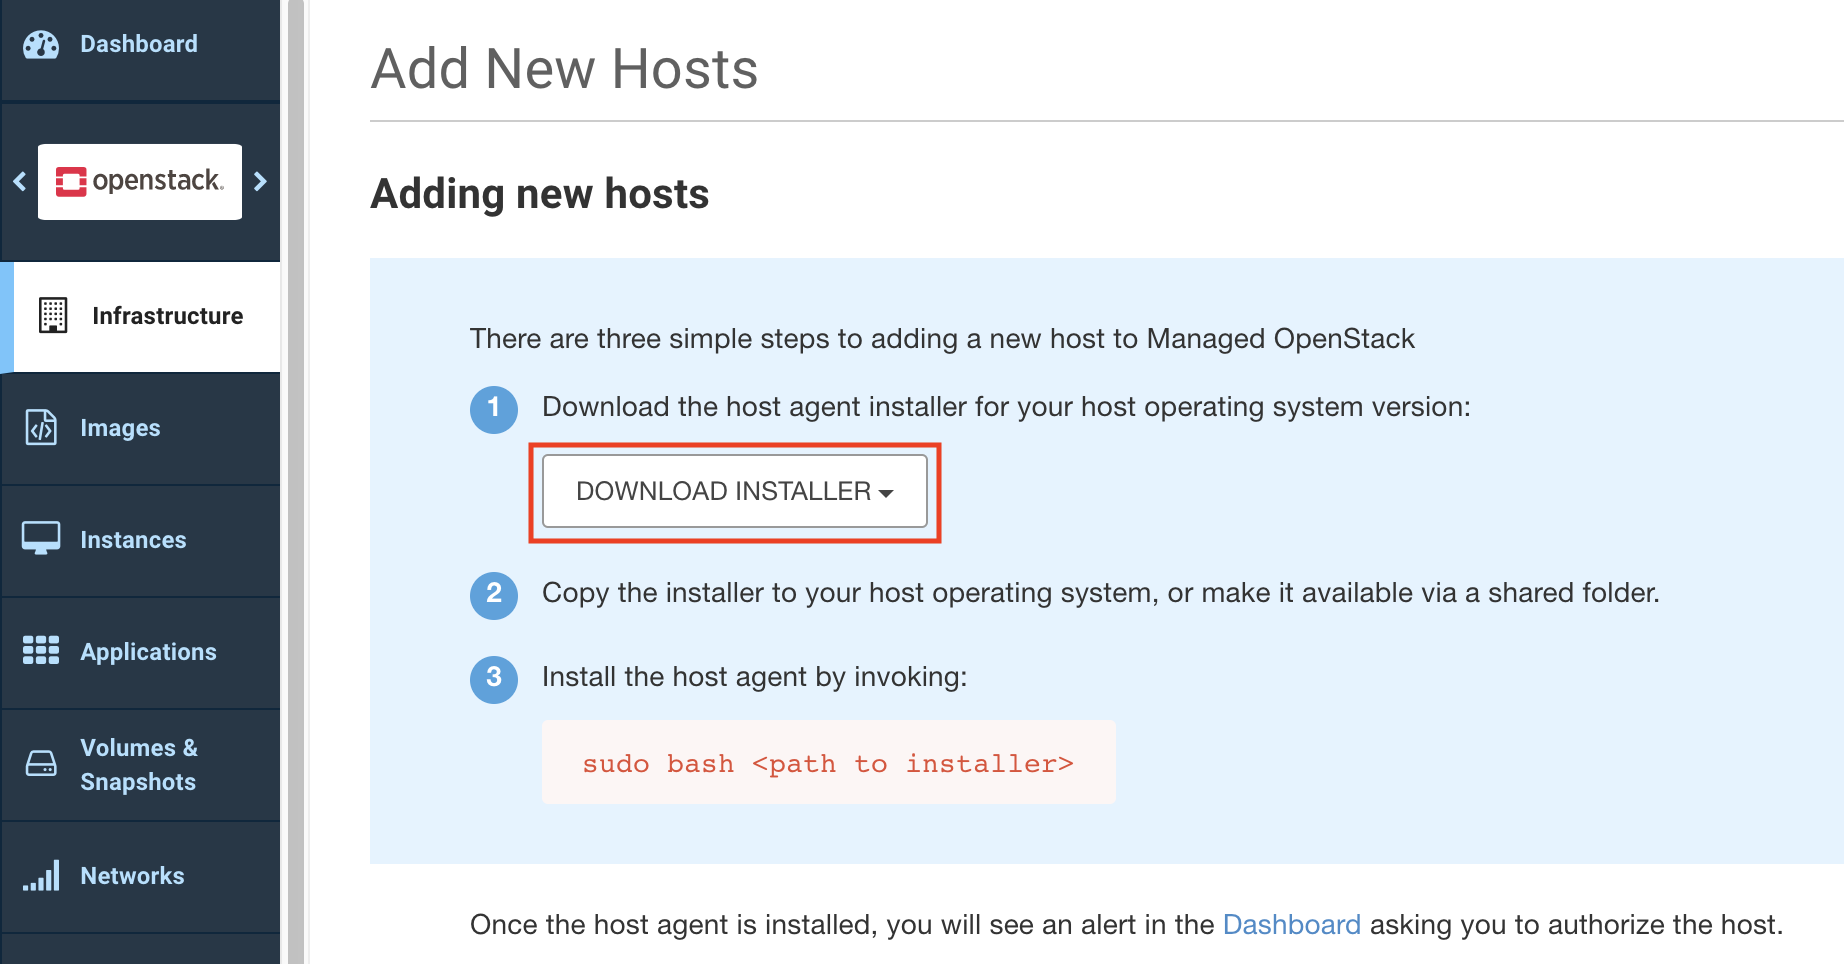
- Copy the installer to the host operating system or to a shared folder.
- Install the host agent by running the command
sudo bash <path to installer>. Ensure that the host agent installation has succeeded – a message indicating installation success is displayed on your host command line or console. - Click the public GPG key link on the Add New Hosts page to download the public GPG key.
- Verify the packages downloaded with the installer.
The host is added and is visible on the Dashboard.
Once the host has been added, you must authorize the host. After authorizing the host, you can configure it with one or more roles and tweak the hypervisor configuration to setup networking interfaces, etc.
Was this page helpful?